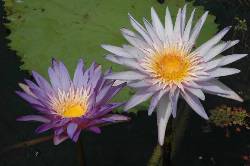
In Warm Climates
For those of us with really warm climates and long seasons, getting tropical waterlilies to tuber can be very difficult. Too often, plants overgrow and develop large rhizomes that rarely produce new plants. In order to replicate desirable plants, we have had to develop methods different from those possible in colder areas.
It's really important to say at the outset that these methods only work for small plants that have NOT developed a growth rhizome. A few varieties will make new plants from big rhizomes but most won't. Some people have success turning pots over under benches and others simply throw plants on the ground to promote tuber formation. We can't do that as they are candy for a variety of critters, especially rats. We have to float them.
The earliest that we recommend floating a plant for tuber is when it has several healthy floating leaves. If you are evaluating a new plant and want to bloom it before tubering, allow only a few flowers to open before committing to floating it. It's far better to have a small plant and a tuber than a single large plant that won't tuber!
|
|
|
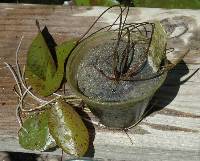
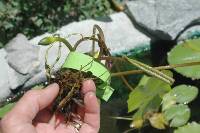
| Remove the plant from the pot, wash away the soil, trim roots to deprive it of nutrients, tag it and float it. After some experimenting, we feel tubers form faster in full sun and very warm water than in shaded cooler water. In a few weeks, you will have a little tuber forming under the crown. | ||
|
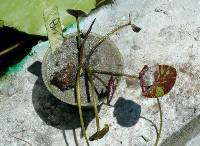
Plants that have reached blooming size can take more time to produce a tuber and the tuber is likely to be larger. Remove larger leaves a few at a time and continue to trim off developing roots. With any size plant you are trying to tuber, it is important to shut the plant down far enough that it will be possible to remove the plant without damaging the tuber. In some cases, this may have to be all the way to small underwater leaves. | |
|
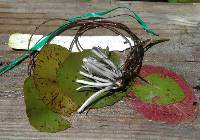
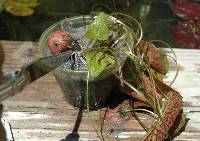
Plant the tuber on its side or even at a downward angle. Be sure not to bury the rosette leaves. The tuber need not be buried in the soil. When the plant has several floating leaves and has developed roots independent of the tuber, you can consider trying to remove the tuber. Sometimes it will twist off rather easily. Other times it will be necessary to remove it with a knife as below | |
|
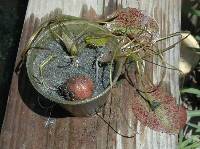
You can either remove the plant(s) and tuber from the soil or, if you can see well enough, leave the plants in the soil. With the tip of a knife, gently pry the plants from the tuber. THIS CAN BE VERY TRICKY SO BE CAREFUL! |
|
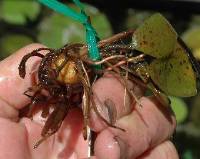
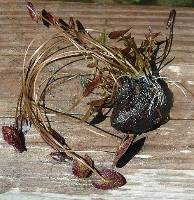
| In the process of this illustration, I severed two smaller plants above their tiny crowns killing them, though two larger plants came away from the tuber intact. Another still attached to the tuber may survive. | ||
|
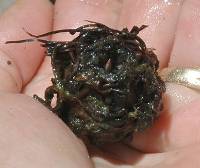
< A tuber from which two plants were removed with a knife tip. A tiny new plant can be seen forming right in the center after about a week in very warm water. A tuber gone mad! This was restarted about two weeks prior to the photo. > |
 |
|
|
||
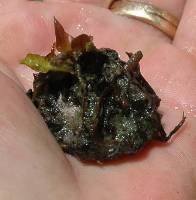
| Not long ago, I thought I had pried too deeply into a tuber removing a plant and decided to dust the wound with antifungal powder. Our dog Cheech was extremely interested in the smell of the powder but wandered away. I thought I would allow the tuber and powder to dry briefly on the edge of a propagation pond, turned away, and heard a loud crunch. Cheech was eating the tuber! I grabbed his mouth and extracted the tuber, but not before he had cracked it in half. Even though I was sure it would rot before it had a chance to reproduce, I put it in warm water to give it a chance. This tiny plant is trying hard to prove me wrong! > |
|
|
Tropical Waterlily Tuber Propagation by Sean Stevens
Tuber Production of Tropical Waterlilies by Walter Pagels
Repotting Overgrown Tropical Waterlilies by Kit Knotts