|
Top and Face for a Raised Pond |
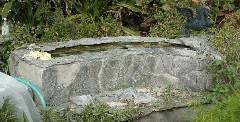 |
| Topping and facing a raised pond with stone present some special challenges not found creating stone borders and walkways. We're dealing with angles, how the top meets the face and how corners come together. This pond is also curved, bringing thickness into the equation. For the top, we need rocks the proper width to span it without too much or too little overhang. | ||
| The stone we use throughout the garden is Beech Mountain Emerald Gray. It is not especially brittle so can be shaped for good fit if necessary. We buy it by the pallet making it relatively inexpensive. By laying it out on the driveway, we can see the shapes and sizes easily. |
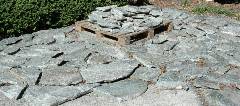 The rock pile |
|
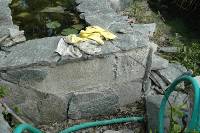
| The pond itself is two courses of concrete block lined on the inside with concrete. The bottom is 3-4" thick with the sides thinner, 1-2", and the concrete wraps over and into the top block. This creates a firm top surface. The pond should be full of water to assure that it is level and that the stone is set high enough to clear the water. | ||
 Unset top rocks |
Materials and tools: brick hammer, pointed trowel, bagged mortar mix, a bucket or other mixing container, hose and nozzle, wire brush (in case we don't wash the mortar off quickly enough), rubber gloves, a little ordinary vinegar. We select the top rocks first since width is a consideration. These rocks should overhang the top by an inch or two to hide the inner edge of the pond and meld with the face. If thickness differs, this can be adjusted when setting in mortar. We vary rock sizes, shapes and slants, shaping as necessary with the brick hammer. |
|
|
|
||
|
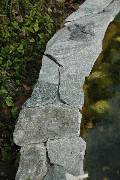
For the face, we select several large rocks for the base and place them at intervals. It's important visually NOT to have all large rocks at the bottom and small ones at the top. It's also good to break up long horizontal and vertical lines. With this curved face, somewhat concave rocks work well. The lower course often has to be set in mortar before selecting upper rocks to keep the whole group from falling. We wet the face immediately before setting to assure adhesion. We mix the mortar a little stiff so it doesn't slip off the back of the rocks, flip the rocks into place and tap them until they sound solid. For the top surface, we place the mortar on the pond edge and tap the rocks into it. Some mortar should "squish" out from between rocks as we do this. After about 30 minutes, we hose the newly set stone to remove excess mortar, returning several hours later to rinse again. Unwanted mortar that has already set firmly can be removed with the wire brush. |
|
|
|
||
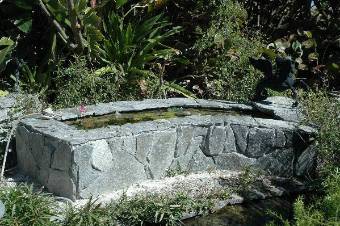 |
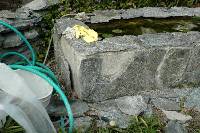
Though we make an effort to keep stone and mortar out of the pond, some does get in with no apparent detriment to plants. A splash of vinegar in the water reduces the pH increase caused by the lime in the mortar.
|
|
|
|
|
|
|
|
||